Spring Security


Spring Security简介
Spring Security是一个高庭自定义的安全框架。利用Spring loC/Dl和AOP功能,为系统提供了声明式安全访问控制功能,减少了为系统安全而编写大量重复代码的工作。使用 Spring Secruity的原因有很多,但大部分都是发现了javaEE的 Servlet 规范或EJB规范中的安全功能缺乏典型企业应用场景。同时认识到他们在WAR或EAR级别无法移植。因此如果你更换服务器环境,还有大量工作去重新配置你的应用程序。使用 Spring Security解决了这些问题,也为你提供许多其他有用的、可定制的安全功能。正如你可能知道的两个应用程序的两个主要区域是“认证“和“授权”(或者访问控制)。这两点也是Spring Security重要核心功能。“认证”,是建立一个他声明的主体的过程(一个“主体”一般是指用户,设备或一些可以在你的应用程序中执行动作的其他系统),通俗点说就是系统认为用户是否能登录。“授权“指确定一个主体是否允许在你的应用程序执行一个动作的过程。通俗点讲就是系统判断用户是否有权限去做某些事情。
快速入门
导入依赖
<!-- SpringSecurity 组件-->
        <dependency>
            <groupId>org.springframework.boot</groupId>
            <artifactId>spring-boot-starter-security</artifactId>
        </dependency>
        <!--web 组件-->
        <dependency>
            <groupId>org.springframework.boot</groupId>
            <artifactId>spring-boot-starter-web</artifactId>
        </dependency>
        <!---Test 组件-->
        <dependency>
            <groupId>org.springframework.boot</groupId>
            <artifactId>spring-boot-starter-test</artifactId>
            <scope>test</scope>
            <exclusions>
                <exclusion>
                    <groupId>org.junit.vintage</groupId>
                    <artifactId>junit-vintage-engine</artifactId>
                </exclusion>
            </exclusions>
        </dependency>
        <dependency>
            <groupId>org.springframework.security</groupId>
            <artifactId>spring-security-test</artifactId>
            <scope>test</scope>
        </dependency>
UserDetailsService
package org.springframework.security.core.userdetails;

public interface UserDetailsService {
    UserDetails loadUserByUsername(String var1) throws UsernameNotFoundException;
}
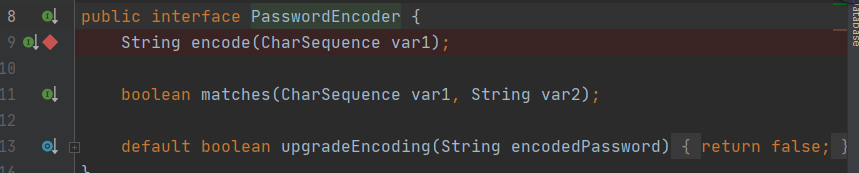
PasswordEncoder密码解析器
Spring Security 要求容器中必须有PasswordEncoder实例。所以当自定义登景逻辑时要求必须给容器注入PaswordEncoder 的bean对象。
接口介绍
- encode() :把参数按照特定的解析规则进行解析
- matches():验证从存储中获取的编码密码与编码后提交的原始密码是否匹配,则返回 true,如果不匹配,则返回 false。第一参数表示被解析的密码,第二个参数表示存储的密码。
- upgradeEncoding ( ) :如果解析的密码能够再次解析且达到更安全的结果,则返回 true,否则返回 false,默认返回 false。
测试PasswordEncoder
@SpringBootTest
class SpringsecurityDemoApplicationTests {

    @Test
    void TestPasswordEncoder() {
        //推荐使用BCryptPasswordEncoder()来实现
        PasswordEncoder pw=new BCryptPasswordEncoder();
        //加密明文密码
        String encode=pw.encode("123456");
        System.out.println(encode);

        boolean matches=pw.matches("123456",encode);
        System.out.println(matches);
    }

}

结果:
//1.
$2a$10$OuUV2MMtAHbrLggli5v9NuNWUJN/ta.xonKHQQc0B.NON0y3RpPF2
true
//2.
$2a$10$7IYwRo639Rb4MeN5hgS5Hu.eRxxfr/qPxq0f5BFSg.NR7j/Y3lXjq
true

 //可以发现,每次生成的密文都不一样,因为在BCryptPasswordEncoder();每次都会生成新的盐
自定义登录逻辑
SpringSecurity配置类:
/*
* Spring Security的配置类
* */
@Configuration
public class SecurityConfig {
    //将PasswordEncoder注入容器,方便使用
    @Bean
    public PasswordEncoder getPw(){
        //返回一个PasswordEncoder实例
        return new BCryptPasswordEncoder();
    }
}
UserDetailsService的实现类
/*
* UserDetailsService的实现类
* */
@Service
public class UserDetailsServiceImpl implements UserDetailsService {
    @Autowired
    private PasswordEncoder pw;
    @Override
    public UserDetails loadUserByUsername(String username) throws UsernameNotFoundException {
        //1.查询传进来到的用户名(username)在数据库中是否存在,如果不存在就抛出异常:UsernameNotFoundException
        //下面先使用假数据:
        if (!"admin".equals(username)){
            throw new UsernameNotFoundException("用户名不存在");
        }
        //2.如果用户名存在,把查询出来的密码(注册时已经加密过的)进行解析,或者直接把密码放入构造方法,下面也使用假数据
        //下面这个User是SpringSecurity中的User,类似于Shiro中的Subject
        String password=pw.encode("123");
         // User构造方法的参数:
        //1.当前用户的用户名
        //1.当前用户的密码
        //1.当前用户的权限
        return new User(username,password,
                        AuthorityUtils.commaSeparatedStringToAuthorityList("admin,normal"));
    }
}
这时启动项目,直接在SpringSecurity的内置登录页登录,如果输入用户名为admin,密码为123,登录时,就不会报用户名或者密码错误了。其他的都会报用户名或者密码错误
自定义登录页面
自定义登录页面较为简单,只需要通过继承WebSecurityConfigurerAdapter来修改它的默认登录页面
自定义登录页面:login.html
<!DOCTYPE html>
<html lang="en">
<head>
    <meta charset="UTF-8">
    <title>Title</title>
</head>
<body>
<form action="/login" method="post">
    用户名:<input type="text" name="username">
    密码:<input type="password" name="password">
    <input type="submit" value="登录">
</form>
</body>
</html>
主页:main.html
<!DOCTYPE html>
<html lang="en">
<head>
    <meta charset="UTF-8">
    <title>Title</title>
</head>
<body>
<h1>登录成功</h1>
</body>
</html>
登录失败页面:error.html
<!DOCTYPE html>
<html lang="en">
<head>
    <meta charset="UTF-8">
    <title>登录失败</title>
</head>
<body>
<h1><a href="/login.html">登录失败,请重新登录</a></h1>
</body>
</html>
控制类:
@Controller
public class LoginController {
   // @RequestMapping("/login")
   // public String Login(){
   //    return "redirect:main.html";
   // }

    @RequestMapping("/toMain")
    public String toMain(){
        return "redirect:main.html";
    }
}
    @RequestMapping("/toError")
    public String toError(){
        return "redirect:error.html";
    }
配置类:
@Configuration
public class SecurityConfig extends WebSecurityConfigurerAdapter {
    //重写configure方法来自定义登录页面
    @Override
    protected void configure(HttpSecurity http) throws Exception {
        //表单提交
       http.formLogin()
               //登录的URL,注:必须要与咱们自定义的登录页面的表单请求的提交路径 action="路径" 一致。
               .loginProcessingUrl("/login")
               //自定义登录页面
               .loginPage("/login.html")
               //登录成功后要跳转的页面,必须是Post请求,所以不能直接写页面,要用controller做页面跳转
               //.successForwardUrl("/main.html");
               .successForwardUrl("/toMain")
              //登录失败后要跳转的页面,也是Post请求,要用controller做页面跳转
               .failureForwardUrl("/toError");

       //授权认证
        http.authorizeRequests()
                //    放行:登录错误页/error.html不需要认证
                .antMatchers("/error.html").permitAll()
                //     放行: 登录页/login.html不需要认证
                .antMatchers("/login.html").permitAll()
                //放行静态资源
                .antMatchers("/js/**","/css/**","/images/**").permitAll()
                //放行目录下的所有png图片
                .antMatchers("/**/*.png").permitAll()
                //所有请求都必须在被认证后(登录后),才能被访问
                .anyRequest().authenticated();
             //当访问/login.html和/error.html等以外的其他请求时,会自动跳转到login.html页面

        //关闭csrf防护
        http.csrf().disable();
    }

    @Bean
    public PasswordEncoder getPw(){
        //返回一个PasswordEncoder实例
        return new BCryptPasswordEncoder();
    }
}
设置请求账号和密码的参数名
因为在SpringSecurity中,在执行自定义登录逻辑的时候,先会执行一个过滤器,登录页的用户名的参数名name必须为username,密码的参数名name必须为password,且登录请求类型必须为post,所以如果你在登录页中的用户名和密码使用了其他的参数名,过滤器便获取不到传过来的参数的值,过滤器部分代码如下:
public class UsernamePasswordAuthenticationFilter extends AbstractAuthenticationProcessingFilter {
    public static final String SPRING_SECURITY_FORM_USERNAME_KEY = "username";
    public static final String SPRING_SECURITY_FORM_PASSWORD_KEY = "password";
    private static final AntPathRequestMatcher DEFAULT_ANT_PATH_REQUEST_MATCHER = new AntPathRequestMatcher("/login", "POST");
    //用户名的参数名
    private String usernameParameter = "username";
    //密码的参数名
    private String passwordParameter = "password";
    //只允许post请求
    private boolean postOnly = true;
    .......
如果想要自定义登录页的用户名和密码的参数名,其实也很简单,在配置类中进行如下声明:
@Configuration
public class SecurityConfig extends WebSecurityConfigurerAdapter {
    @Override
    protected void configure(HttpSecurity http) throws Exception {
        //表单提交
       http.formLogin()
               //自定义用户名和密码的参数名
               .usernameParameter("usernameDIY")
               .passwordParameter("passwordDIY")

           ......
    }
}

//这样便可以在登录页面使用自定义的name参数名:
//      <form action="/login" method="post">
//        用户名:<input type="text" name="usernameDIY">
//          密码:<input type="password" name="passwordDIY">
//               <input type="submit" value="登录">
//           </form>
自定义登录成功/失败处理器
对于前后端分离项目而言,登录成功后不能直接使用controller来进行跳转,其需要一个真正的URL路径
实现AuthenticationSuccessHandler和AuthenticationFailureHandler:
1.登录成功处理器:AuthenticationSuccessHandler
public class MyAuthenticationSuccessHandler implements AuthenticationSuccessHandler {

    private String url;//登录成功要跳转的URL
    public MyAuthenticationSuccessHandler(String url){
        this.url=url;
    }
    @Override
    public void onAuthenticationSuccess(HttpServletRequest httpServletRequest, HttpServletResponse httpServletResponse, Authentication authentication) throws IOException, ServletException {
        httpServletResponse.sendRedirect(url);
      /* //可以通过authentication获取当前用户的信息
        User user= (User) authentication.getPrincipal();
        System.out.println(user.getUsername());
        //考虑到安全问题,密码不会打印出来,只会打印null
        System.out.println(user.getPassword());
        System.out.println(user.getAuthorities());*/
    }
}
2.登录失败处理器:AuthenticationFailureHandler
public class MyAuthenticationFailureHandler implements AuthenticationFailureHandler {
    private String url;//登录失败要跳转的URL
    public MyAuthenticationFailureHandler(String url){
        this.url=url;
    }
    @Override
    public void onAuthenticationFailure(HttpServletRequest httpServletRequest, HttpServletResponse httpServletResponse, AuthenticationException e) throws IOException, ServletException {
        httpServletResponse.sendRedirect(url);
    }
}
3.使用:successHandler/failureHandler
@Configuration
public class SecurityConfig extends WebSecurityConfigurerAdapter {
    //重写configure方法来自定义登录页面
    @Override
    protected void configure(HttpSecurity http) throws Exception {
        //表单提交
       http.formLogin()

           .......


         // .successForwardUrl("/toMain")
         //登录成功后的处理器,不能与successForwardUrl共存,否则会报错
         // .successHandler(new MyAuthenticationSuccessHandler("main.html"))
         .successHandler(new MyAuthenticationSuccessHandler("http://www.baidu.com"))//登录成功后跳转到百度
        //登录失败后的处理器,不能与successForwardUrl共存,否则会报错
        .failureHandler(new MyAuthenticationFailureHandler("error.html"));//登录后要跳转的页面,无需经过controller跳转
        //.failureForwardUrl("/toError");

            .......

    @Bean
    public PasswordEncoder getPw(){
        //返回一个PasswordEncoder实例
        return new BCryptPasswordEncoder();
    }
}
regexMatchers详解
regexMatchers与antMatchers不同的是:
antMatchers的参数是antPatterns,而regexMatchers的参数是正则表达式。
如:
        .......
http.authorizeRequests()
        .antMatchers("/js/**","/css/**","/images/**").permitAll()
        //放行目录下的所有png图片
        .onMatchers("/**/*.png").permitAll()
        //放行所有jpg图片
        .regexMatchers(".+[.]jpg").permitAll()
        //所有请求都必须在被认证后(登录后),才能被访问
        .anyRequest().authenticated();

        .......
另外,regexMatchers还有一个双参数的用户:
比如有个GET方式的controller请求:
@GetMapping("/demo")
  @ResponseBody
  public String demo(){
      return "demo";
  }
//HttpMethod指定放行的请求的请求方式
.regexMatchers(HttpMethod.Post,"/demo").permitAll()//表示放行请求类型为Post的请求/demo
//而controller中的 /demo 请求为GET类型,所以当我们访问/demo时也会被拦截权限判断
hasAuthority (String)
判断用户是否具有特定的权限,用户的权限是在自定义登录逻辑中创建User对象时指定的,注意:权限的书写严格区分大小写
如下:给当前用户赋予admin和nomal的权限:
return new User(username,password, AuthorityUtils.commaSeparatedStringToAuthorityList("admin,normal"));在配置类中通过hasAuthority(”admin”)设置具有admin权限才能访问:
.antMatchers("/main1.html").hasAuthority("admin")hasAnyAuthority(String …)
如果用户具备给定权限中的某一个,就允许被访问。
.antMatchers("/main1.html").hasAuthority("admin","normal")角色判断
用户的角色也是在自定义登录逻辑中创建User对象时指定的,注意指定用户角色的固定写法:ROLE_xxxx,xxxx表示角色名
    return new User(username,password,                     AuthorityUtils.commaSeparatedStringToAuthorityList("admin,normal,ROLE_admin"));
//ROLE_admin:管理员角色
hasRole(String)
判断用户是否具有特定的角色:
//是否具有管理员admin角色
.antMatchers("/main1.html").hasRole("admin")
hasAnyRole( String… )
判断用户是否具有给定角色中的某一个的角色:
.antMatchers("/main1.html").hasAnyRole("admin","ADmin")总结
| 表达式 | 说明 |
|---|---|
| hasRole | 用户具备某个角色即可访问资源 |
| hasAnyRole | 用户具备多个角色中的任意一个即可访问资源 |
| hasAuthority | 类似于 hasRole |
| hasAnyAuthority | 类似于 hasAnyRole |
| permitAll | 统统允许访问 |
| denyAll | 统统拒绝访问 |
| isAnonymous | 判断是否匿名用户 |
| isAuthenticated | 判断是否认证成功 |
| isRememberMe | 判断是否通过记住我登录的 |
| isFullyAuthenticated | 判断是否用户名/密码登录的 |
| principle | 当前用户 |
| authentication | 从 SecurityContext 中提取出来的用户对象 |
IP地址判断
指定有权访问的服务器IP地址:
.antMatchers("/main1.html").hasIpAddress("127.0.0.1")获取IP地址可以处理器中调用getRemoteAddr()方法:
public class MyAuthenticationSuccessHandler implements AuthenticationSuccessHandler {

    private String url;//登录成功要跳转的URL
    public MyAuthenticationSuccessHandler(String url){
        this.url=url;
    }
    @Override
    public void onAuthenticationSuccess(HttpServletRequest httpServletRequest, HttpServletResponse httpServletResponse, Authentication authentication) throws IOException, ServletException {
        httpServletResponse.sendRedirect(url);
        //获取ip地址--------------------------------------:
        System.out.println(httpServletRequest.getRemoteAddr());
    }
}
自定义403处理方案
第一步:实现AccessDeniedHandler
@Component
public class MyAccessDeniedHandler implements AccessDeniedHandler {
    @Override
    public void handle(HttpServletRequest httpServletRequest, HttpServletResponse httpServletResponse, AccessDeniedException e) throws IOException, ServletException {
        //设置403的状态码,SC_FORBIDDEN
        httpServletResponse.setStatus(HttpServletResponse.SC_FORBIDDEN);
        //设置响应的请求头
        httpServletResponse.setHeader("Content-Type","application/json;charset=utf-8");
        //设置无权访问时页面响应数据
        PrintWriter writer=httpServletResponse.getWriter();
        writer.write("{\"status\":\"error\",\"msg\":\"权限不足,请联系管理员\"}");
        writer.flush();
        writer.close();
    }
}
第二步:配置
@Configuration
public class SecurityConfig extends WebSecurityConfigurerAdapter {
    @Autowired
    private MyAccessDeniedHandler myAccessDeniedHandler;
    //重写configure方法来自定义登录页面
    @Override
    protected void configure(HttpSecurity http) throws Exception {

        .........

        //403处理-----------------------------------
        http.exceptionHandling()
                .accessDeniedHandler(myAccessDeniedHandler);
    }

        ........
}
当无权访问时,打印出如下数据:
{"status":"error","msg":"权限不足,请联系管理员"}


- Post link: http://sovzn.github.io/2021/04/19/SpringSecurity-01/
- Copyright Notice: All articles in this blog are licensed under unless otherwise stated.
若没有本文 Issue,您可以使用 Comment 模版新建。
GitHub Issues